Saturday, August 3, 2013

I Can, Can, Can, Can


I have been interested in canning and preserving for awhile.  I can remember when I was younger my Mom was always canning and preserving fresh fruits and vegetables from her garden.  We had a whole wall of shelves in our basement that had jars filled with pickles, relish, tomatoes, etc.

Since we moved to New York I have been increasingly curious about canning and preserving since there are so many amazing farmers markets with fresh, seasonal fruits and vegetables.  A few months back I purchased an inexpensive "Guide to Preserving" book.  I was so excited to read, learn and begin canning!

As I was reading I kept seeing warnings about botulism, mold, and salmonella.  You also have to know when to use the boiling-water vs. the pressure method and make sure there is enough acid and jar headspace to ensure it is safe and nothing spoils. Then the book lays out all the equipment needed including "produce protector" and dissolvable labels and warns if you don't follow their recipes EXACTLY you may die!**  Needless to say I was overwhelmed, defeated and scared.  I stored the book away and just relegated myself to the fact that canning and preserving wasn't for me.

Fast-forward a few months and I am chatting with my sister Heather (she is actually my brother's- wife's-sister, but we are all very close and I consider her my sister) about canning since she is an expert chef, baker, entertainer, lawyer and all around amazing person who has also been canning and preserving all sorts of goodies for many years!  I explained to her my disappointment at how hard and complicated canning and preserving seemed.  Being the awesome person she is, she invited me over to her house for a fun day of canning tomatoes that were just about to come into season.  This was a no-brainer for me...I of course said yes and was so thankful that not only was she going to show me how to can tomatoes, but was also gracious enough to let me bring my own tomatoes to can and use all of her equipment and beautiful kitchen.

I arrived with 3 large mason jars, 12 good size tomatoes and of course Champagne (I did say it was a fun day of canning!)  Heather was canning whole tomatoes and had already began roasted them in the oven.  She explained to me that we had to boil the jars and the tops first to sanitize and keep them from cracking.  I decided I was going to do crushed tomatoes, so we boiled them, put them in an ice bath, peeled and then hand crushed them in a bowl.  Then, following instructions from one of Heather's canning books, we put some fresh squeezed lemon and salt into our jars and began adding the tomatoes.  I was surprised that all 12 of my crushed tomatoes fit into 1 jar!  Heather showed me how much space to leave at the top and how to remove air bubbles.  We then put the lids on the jars and placed them on the rack in the boiling for the instructed amount of time and voila! we were done.

It was much simpler and more straight forward that I thought, although I also had a fabulous teacher! 
Heather was patient enough to explain to me what is necessary to do when canning in order to be safe and avoid spoilage and getting sick.  I learned that following recipe instructions based on certain fruits and vegetable acidity levels is extremely important, but is not as intimidating as I previously thought.  I had a fantastic time and although I am clearly not an expert canner/preserver I would definitely feel more comfortable trying it on my own...I Can, Can, Can, Can!  Now of course I also have Heather around to ask questions and borrow books from which is a bonus!  Before I left we chatted about trying to get together in the next few months and experiment with making and preserving ketchup which I am really looking forward to - I will definitely post how that turns out!  I have just began my canning/preserving journey, but I am looking forward to where it will take me and of course will be update you on my progress!

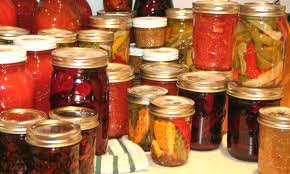
Check out the pictures below of my first experience canning tomatoes.  I would also love to hear from you about any of your canning recipes, tips, ideas and books you like!


My first jar of canned crushed tomatoes! (Well my first jar of canned anything for that matter :)


**Be sure to always research and learn the safe practices necessary when canning and preserving before attempting.  The dangers of not canning properly are serious and can make you very sick, so please make sure you know what you are doing and follow the proper instructions EVERY time you are canning/preserving.

Book Review: In Defense of Food


Prior to reading In Defense of Food I was already a huge fan of Michael Pollan.  I had previously read his book The Omnivores Dilemma (which I also highly recommend) and Food, Inc. is one of my favorite food related documentaries.


I do realize that I may be preaching to the choir in regards to those of you that are into organic, sustainable and clean eating as much as I am...you are probably already very aware of who Michael Pollan is and have already read In Defense of Food.  For those of you that are not familiar with Michael Pollan and his work, I HIGHLY recommend starting off with watching Food, Inc. and reading In Defense of Food...it will literally change your life.

So if you can't already tell, this is a positive review of the book :)  Pollan is able to encompass the whole theme of the book into seven very insightful and inspiring words: Eat Food. Not Too Much. Mostly Plants.  Can it really be that simple?  Yes it can, and Pollan explains how in his "Eater's Manifesto".

Michael Pollan begins by explaining how we went From Foods to Nutrients by the way of Nutritionism, defined as "the widely shared but unexpected assumption...that the key to understanding food is indeed the nutrient.  Put another way: Foods are essentially the sum of their nutrient parts."  This is such an interesting concept that is so obviously relevant walking through your average grocery store.  Everything is labeled by their nutrition content instead of actually being labeled what it is. Think "fat free", "no trans fat", "good source of calcium", "added omega-3", "probiotic", etc...you get the point.  I think Pollan explains the paradox of nutritionalism perfectly when he writes "What the Soviet Union was to the ideology of Marxism, the Low-Fat Campaign is to the ideology of nutritionism".  He goes on to write "The problem with nutrient-by-nutrient nutrition science," points out Marion Nestle, a New York University nutritionist, "is that it takes the nutrient out of the context of the food, the food out of the context of the diet, and the diet out of the context of the lifestyle." 


Pollan then goes on to share the history of how food became a science.  He writes, "Harvey Levenstein, who has written two illuminating histories of American food culture, suggests that the sheer abundance of food in America has bred "a vague indifference to food, manifested in a tendency to eat and run, rather than to dine and savor" and that "More patients [are] suffering from "an unhealthy obsession with healthy eating".  This last statement really stuck out to me.  At first read, it sounded like an oxymoron, but the more I thought about it, the more truthful I found the statement to be.  As a society we are so wrapped up in the new trend and it is constantly shoved in our faces to follow a certain diet or eat certain foods because we are told it has this and that benefit, when in all reality the healthiest way to eat is consciously - being aware of what we are putting into our body on all levels.  Pollan echoes this same sentiment when he writes, "So this is what putting science, and scientism, in charge of the American diet has gotten us: anxiety and confusion about even the most basic questions of food and health, and a steadily diminishing ability to enjoy one of the great pleasures of life without guilt or neurosis"

So, what steps can we take in our daily lives to be more conscious about what we eat and be legitimately healthier?  Michael Pollan discusses this topic thoroughly and outlines a myriad of principle in which we can all apply to our lives.  The biggest piece of advice he gives is to "just eat food", which sounds (and should be) so simple, but as he explains is anything but simple given the way our food system (industry) is set-up.  Below are just a few of the proposals Pollan makes for what we can do to weed through the confusion that is our food system:
  •  "Don't eat anything your Great Grandmother wouldn't recognize as food" 
  • "Avoid food products containing ingredients that are A) unfamiliar, B) unpronounceable, C)  more than five in number or that include D) high-fructose corn syrup"
  • "Avoid  food products that make health claims"
  • "Eat mostly plants, especially leaves"
    • "Thomas Jefferson probably had the right idea when he recommended using meat more as a flavor principle than as a main course, treating it is a "condiment for the vegetables"
    • "A 2006 report issued by the United Nations stated that the world's livestock generate more greenhouse gases than the entire transportation industry.
  • "Get out of the supermarket whenever possible"
  • Remember that "You are what what you eat eats too"
  • "Eat meals"
  •  "Don't get your fuel from the same place your car does"
  • "Eat Slowly"   
Like I said, above are just a few of the "rules of thumb" outlined in In Defense of Food, there are many principles and Pollan goes into much more detail about each of them...these are just the ones that stood out to me.  What are the ones you like the most?

The author ends his book with an insightful statement that I think we can all agree on: "The cook in the kitchen preparing a meal from plants and animals at the end of this shortest of food chains has a great many things to worry about, but "health" is simply not one of them, because it is a given."  Well said Michael Pollan, well said!

Overall, I thoroughly enjoyed this book and would recommend it to everyone no matter where you are on your sustainable food journey.  This blog post was difficult for me to write because I felt like I could just go on and on discussing everything I loved, but I had to stop because in the end I want you to read it and make conclusions for yourself.  If you have read it, what are some of your favorite parts?  If you haven't read it I would love to hear your comments once you do.  Enjoy!


Saturday, July 20, 2013

Dual Recipe Post - Stuffed Swiss Chard Rolls & Mozzarella Sticks

The following two recipes are great for entertaining or for a weekday dinner.  Both recipes are perfect to make for Meatless Mondays or they can be adapted for the meatlovers by adding some ground meat to your marinara sauce.  I thought they fit well together in the same post since they are both Italian style dishes that incorporate marinara sauce; in fact they would probably pair well to serve together!  I hope everyone enjoys these recipes as much as I do!

 ---------------------------------------------------------------------------------------
Brown Rice and Lentil Stuffed Swiss Chard Rolls
I adopted this recipe from

Ingredients

EVOO, for greasing the baking dish
2 Bundles of Swiss chard leaves
2 cups cooked short grain brown rice
1 packed cup baby arugula leaves, chopped
8 oz. goat cheese, at room temperature
1 cup cooked green lentils
1/4 cup extra-virgin olive oil for the filling
Kosher salt, black pepper & cayenne pepper for seasoning (to taste)
2 cloves garlic, minced
One 26-ounce jar organic marinara sauce (or homemade preferably :)
1/2 cup grated Parmesan (or a mix of Italian cheeses - my personal favorite!)
2 tablespoons olive oil for drizzling

Directions

Place an oven rack in the center of the oven. Preheat the oven to 400 degrees F.  Oil a 9.5 by 13.5 inch glass baking dish. Set aside.

Remove the thick stem from the center of each chard leaf. Cut each leaf in half lengthwise. I cut all the leaves and use the biggest halves (approx. 16-18 halves).  Store the remainder of the leaves in a ziploc bag or an airtight container and saute or use later in the week.  Bring a large pot of salted water to a boil over high heat. Add the chard leaves and cook for 10 seconds. Remove the leaves with tongs and rinse with cold water. Drain on paper towels and set aside. (I did this the first time I made this recipe and didn't the second time...I couldn't tell a difference between when I did it and when I didn't).


For the filling: In a medium bowl, mix together the brown rice, arugula, goat cheese, lentils, olive oil, salt, black pepper & cayenne to taste and garlic. 
**NOTES: When making the brown rice and lentils I cook them in vegetable broth for extra flavor and then let cool completely before mixing.  Also, be sure to let the goat cheese sit out and get to room temperature to make it easier to mix.  You will end up having quite a bit of leftover filling.  It tastes great cold added to a salad or used to make lettuce wraps.  I have also heated it up and added a fried egg on top for a delicious breakfast treat :) 


Spoon 1/3 cup of the filling onto the end of each chard leaf and roll up like a jellyroll.


 Cover the bottom of the already greased pan with a little less than half of the marinara sauce. Arrange the rolls, seam-side down, in a single layer on top of the sauce. Spoon the remaining sauce on top and sprinkle with the grated cheese. Drizzle with olive oil and bake until the cheese begins to brown, about 25 minutes. Cool for 5 minutes and serve.
**I like to serve this dish with a classic bruschetta or some crusty bread and a great glass of red wine...yum! :)


---------------------------------------------------------------------------------------
 
Homemade Mozzarella Sticks
Making mozzarella sticks from scratch is so easy and so delicious I will never buy them frozen again!
I made my own breadcrumbs using some unused hamburger & hotdog buns and the ends of some sprouted bread I had laying around.  Just cut up the bread into smaller pieces, throw them in a food processor or blender until chopped up finely.  Spread the chopped up bread crumbs on a baking sheet and put in a 250 degree oven for 15-20 minutes, let cool, store in an airtight container and your done!
**For this recipe I combined my homemade breadcrumbs with oregano, parsley, salt, pepper and garlic to make them more Italian style.


Ingredients
 
2 cups of Italian style breadcrumbs (homemade or store bought)
3-4 eggs, beaten
1 medium-large mozzarella ball
1/2 cup grated Parmesan cheese
1 liter olive oil or vegetable oil
Marinara sauce for dipping (homemade or organic store bought) 

Directions
 
Line a baking sheet with parchment paper.
 
 
Mix the breadcrumbs and the Parmesan cheese (leave a little extra for garnishing) in a mixing bowl.  In a separate mixing bowl whisk the eggs until thoroughly beaten.  Cut the mozzarella into approx. twelve, 1/2 inch sticks.
 
Dip and coat the cheese sticks into the egg wash, allowing the excess egg to drip off and then coat in the bread crumb mixture.  Place the coated mozzarella onto the baking sheet and repeat with the rest of the cheese sticks.  Repeat this process coating each mozzarella stick in the egg was and breadcrumbs for a second time.

Cover the baking sheet with the double coated mozzarella sticks with another piece of parchment paper and put in the freezer for 2 hours or until frozen (you can freeze them for up to about 2 days).


Once the mozzarella sticks are frozen and you are ready to cook, heat up the olive oil in a cast iron skillet (or heavy duty frying pan).  Heat to about 350 degrees (I drop in an excess piece of frozen breadcrumb that may have fell off the mozzarella sticks to test the oil).  Using tongs, carefully drop the frozen mozzarella sticks in the oil in batches of 3.  If using a shallow pan, turn the mozzarella sticks after about 30 seconds.  It only takes about 1-1 1/2 minutes for them to cook and become golden brown.  Remove from the pan using tongs and place on a paper towel lined place and repeat with the next batch until complete.  Sprinkle the rest of the Parmesan cheese over the hot mozzarella sticks and serve with warmed marinara sauce.

**Remember not to waste all that frying oil!  Pour into an airtight glass container, let cool and store for the next time!

Wednesday, July 10, 2013

Cast Iron Cooking

I recently received a cast iron skillet as a birthday gift and have fallen in love!  I have wanted one for awhile and now that I have one I'm not sure how I lived without it.  Below I have outlined a few of the many Eco benefits as well as cooking benefits to using cast iron, I show you the cast iron skillet I purchased and have come to love, and lastly I included a recipe for a roasted organic chicken in a cast iron skillet.
What is your favorite thing about your cast iron cookware?  What is your favorite recipe you make using cast iron?  Do you have any good tips for cooking with or cleaning cast iron?  I would love to hear from you about anything cast iron, I am new to this and am eager to learn and cook as much as possible in my new cast iron skillet!
-------------------------------------------------------------------------------------------------
Cast-Iron Benefits:
  • Naturally Non-Stick - Forget the Teflon and other synthetic materials used to make non-stick pans.  Cast iron is the original non-stick without all the harmful and toxic coatings that can leach into your food.
  • Durable - If taken care of properly, a piece of cast iron cookware can last you a lifetime plus!  The best part about cast iron cookware is it gets even better with time.  Even old, worn and/or rusted pieces can be brought back to their original beauty with steel wool and just a little muscle.  Be sure to heat and cool your cast iron cookware gradually to ensure a longer life.
  • Multiple Uses One cast-iron skillet can replace almost all of your other pans.  You can cook practically anything in your cast iron cookware from chicken to cornbread to soups and stews.  Then add that you can cook with cast iron on the stove top, in the oven, on the grill or over an open fire while camping (never in the microwave) and it becomes the most perfect piece of cookware you can get for your money.
  • Simple to Clean - You should NEVER use soap on cast iron or put in the dishwasher.  All you need to clean cast iron is hot water and a sponge or stiff brush.  For really stubborn, stuck on food, just use coarse salt and hot water.  Completely dry the cast iron skillet with a towel or place in the oven over low heat, and then apply a light coating of oil with a paper towel and voila, your done! 
  • Retains Heat - One of the best features of using cast iron cookware is that it heats up quickly and retains heat very well, therefore they cook food evenly and uses less energy in order to do so.
-------------------------------------------------------------------------------------------------
Below is a picture of the 12 inch round (approx. 1 1/2 inch deep) cast iron skillet I recently purchased along with an adorable sign that was posted in the store I bought it from.  The cast iron skillet came already seasoned and cost $38.00.  Considering that it is the primary cooking pan I have used since I got it, I would say it has already paid for itself! 


------------------------------------------------------------------------------------------------- 
RECIPE: Roasted Organic Chicken in the Cast Iron Skillet

Tonight I decided to roast an organic chicken in my cast iron skillet.  It turned out juicy with perfectly crispy skin and was just plain delicious...my husband said it was the best roasted chicken I have ever made!  Below is my recipe for Roasted Organic Chicken in the Cast Iron Skillet:
  • Preheat oven to 450 degrees
  • Lightly oil the bottom of the cast iron skillet and place the whole chicken in the pan
  • Place small slabs of butter under the skill of the breasts and legs
  • Squeeze a medium lemon (cut in half all over the outside of the chicken (save the lemon halves for the cavity) and season with salt, pepper and paprika
  • Stuff the cavity with 4 garlic cloves and the 2 lemon halves you used to squeeze over the outside
  • Place in the oven and cook for approx. 45 minutes, until the juices run clear or until the internal temp reaches 160 degrees.
  • Remove from the cast iron skillet and let rest for about 10 minutes before carving.
**You can also add a nice variety of root vegetables and potatoes to the pan to roast with the chicken.  I served it with a fresh green salad since that is what I had around the house.
**I always roast the innards when roasting a chicken since I personally find them delicious!  I just season them the same as I season the outside of the bird.
**Be sure to save the carcass to make an easy and delicious chicken stock (recipe HERE) with all the leftover scrapings.  And if you do not like to eat the innards like I do, you still roast them with the chicken and then simmer in your stock for added flavor.

 Enjoy!


Wednesday, June 5, 2013

Recipe: Orecchiette with Garlic, Broccoli and Olive Oil


I have been traveling and working so much lately which is why it has been a little while since my last post.  I am now back home in New York and have just started getting back into the groove of things.  While I was traveling, one of the things I really missed was cooking and since I have been back I have really gotten back into it and have been experimenting with tons of new recipes!
I made this recipe tonight, it is simple, quick, vegetarian and so delicious!  You can even make this dish vegan just by omitting the cheese and it would still be fantastic!
INGREDIENTS **all organic
  • 8 oz uncooked whole wheat orecchiette pasta
  • 3 TBSP Extra Virgin Olive Oil (plus extra to drizzle at the end)
  • 1 shallot diced
  • 2 cloves of garlic diced
  • 2 medium heads of broccoli sliced into thin florets
  • Salt, pepper and red paper flakes to taste
  • Parmesan cheese
RECIPE
  • Bring approx. 10 cups of water to a boil (Before you add the pasta sprinkle the boiling water with salt
  • Add the uncooked pasta, bring back to a boil and cook approx. 10 minutes (or about a minute less than the instructions on the package)
  • While the pasta is cooking, in a large saute pan heat the 3 TBSP of EVOO over medium heat.
  • Add the diced shallots and garlic to the pan and saute for a minute or so and then add the broccoli.  (You can also add some sliced mushrooms when you add the broccoli for a more meaty flavor and texture)
  • Add salt, pepper & red pepper flakes to taste and saute over medium heat until broccoli is tender (approx. 10 minutes)
  • Add the pasta to the saute pan and toss to coat.  The pasta will finish cooking in the saute pan (about another minute)
  • Once all ingredients are mixed and pasta is cooked turn off the heat, sprinkle with freshly grated Parmesan cheese and serve!
So, that's it...it is actually that easy!  Like I said,  I made this a vegetarian dish, but as stated above you can also omit the cheese to make it vegan and of course you can always add grilled chicken or Italian sausage.  This dish is hearty enough to serve as a meal with some crusty bread and also light enough to serve as a summer side dish.
I hope you like it is as much as me and my family did...let me know what you think!

Friday, April 26, 2013

The Popcorn Weekly - Coconut Oil

For this weeks popcorn recipe I decided to use coconut oil.  Coconut oil is a heart healthy food and has so many amazing health benefits.  According to Dr. Oz coconut oil helps "our bodies mount resistance to both viruses and bacteria that can cause illness...it can also can help to fight off yeast, fungus and candida. [Coconut Oil also] boosts thyroid function helping to increase metabolism, energy and endurance. It increases digestion and helps to absorb fat-soluble vitamins."  I've also heard that it can be used to help prevent wrinkles, is amazing for dry skin and hair and can even be used to shave your legs!  Coconut oil has a high-heat point so it is also ideal when frying foods.

I use organic coconut oil for a good majority of my cooking, so I thought Why not popcorn?!?  I know what you are thinking, Doesn't it make everything taste like coconut?  It actually doesn't!  I've cooked everything from chicken & sausage to eggs using coconut oil and it NEVER had a coconut flavor!  I think it can be interchanged in a lot of recipes that call for oil (keeping in mind its high heat point)  Now if you were to taste the coconut oil by itself, then yes, of course it tastes like coconut!

With that being said, I was expecting the popcorn to hold some of the coconut flavor since popcorn tends to really absorb the flavor of what it is being cooked in.  Since I wasn't quite sure how this popcorn recipe was going to turn out, I decided to make a smaller batch...just in case!  I scooped a small spoonful (approx. 1.5 tbsp) into a medium sauce pan.  Once melted, I covered the bottom of the sauce pan with popcorn kernels and began cooking the same way I did HERE.  It did cook differently than any other time I have ever popped popcorn.  Usually once the first couple kernels pop it goes pretty quick with the rest of the kernels.  This time, the first couple kernels popped and then a few more and then it was stagnant for about a minute and a half / two minutes.  I was about to give up and call this recipe a wash and all of a sudden they started popping like crazy!  I think the reason for the inconsistent popping was due to the coconut oils high heat point. Once the popping was finished I sprinkled with some sea salt.

More than anything else, I was worried the popcorn may be burnt because of the weird popping...but it wasn't at all.  Overall, I really enjoyed this popcorn recipe.  It did have a unique flavor...not necessarily a coconut flavor, but it was a little sweet.  I really liked the sweetness from the coconut oil mixed with the sea salt...it was perfect for an after dinner snack!  

I will definitely be making this again and would highly recommend trying this recipe out and using organic coconut oil as a substitute while cooking in general!  Enjoy!


Film Review: American Meat

Hello all!
 
I just recently went to a theatrical screening of the film "American Meat - A Leave It Better Story" with my sister-in-law Colleen** and wanted to share my thoughts about the documentary with you.
I first heard about the film on Twitter and found out they were doing a theatrical screening in NYC.  It was only an $11 donation to see the hour and a half film along with a 5 person question and answer panel.  My sister-in-law and I decided to attend the screening with the "Chefs & Butchers" panel.  The phenomenal panel included: Mary Cleaver - owner of the Cleaver Co., Tom Mylan - executive butcher and co-owner of The Meat Hook, Jake Dickson - butcher & owner of Dickson's Farmstand Meats , Bill Telepan - Chef and owner of Telepan & board member & the executive chef of Wellness in the Schools, and Graham Meriwether - the Director Cinematographer Producer of American Meat.

To sum up the film best, here is the description from the films website, www.americanmeatfilm.com: "American Meat is a pro-farmer look at chicken, hog and cattle production in America. Beginning with a history of our current industrial system, the feedlots and confinement operations are unveiled, not through hidden cameras, but through the eyes of the farmers who live and work there. From there, the story shifts to Polyface Farms, where the Salatin family has developed an alternative agricultural model based on rotational grazing and local distribution. Nationwide, a local-food movement of farmers, chefs, and everyday people has taken root... But could it ever feed us all?"


Needless to say, I was blown away by both the film and the panel.  The film was both informative and inspirational.  I was extremely captivated by Joel Salatin and his farming method; so much so that we are planning a trip to visit Polyface Farms in Virginia later this year.  It is amazing to me that the Salatin method of farming is considered an "alternative agriculture model" since it is actually just the way farming is supposed to be done.  I consider myself pretty educated about this subject so I was really surprised at how much I learned from this film.  I walked away with a lot to think about and wanting to learn more about farming and what I can do to "Leave It Better".  I truly believe that being educated and knowing exactly where your food comes from is the key to creating a sustainable & healthy food system in the U.S.  And, yes, this way of farming CAN fed us all!

Then the panel after the film was a fantastic bonus.  All the people on the panel are a true inspiration and my only complaint is that it wasn't longer!  I was already a huge fan and a customer of The Meat Hook (Tom Mylan) and The Green Table (Mary Cleaver).  I also really enjoyed hearing from Jake Dickson about Dickson's Farmstand Meats and will definitely be checking it out next time I am at the Chelsea Market (which I already love). but I was most impressed with Bill Telepan (http://www.telepan-ny.com) and hearing about the work he does with Wellness in the Schools.

I consider this film a must see.  They just finished their Theatrical Release Tour, but you can pre-order the DVD HERE.  I would love to hear what you guys think of the film too!
---------------------------------------------------------------------------------------------
**Check out my sister-in-laws upholstery and furniture restoration blog http://timberandcloth.blogspot.com/ and follow her on twitter @timberandcloth.  She is an amazing artist, upholsterer/furniture restorer, and teacher.  "Keeping unique furniture pieces free from the landfill by giving them a new life and a new home!"