---------------------------------------------------------------------------------------
Brown Rice and Lentil Stuffed Swiss Chard Rolls
I adopted this recipe from Giada De Laurentiis (chef and Food Network host). I have made this dish twice (once meatless and once with ground turkey in the marinara sauce) and both times it got rave reviews. I follow the original recipe pretty closely, tweaking and adding a few things here and there. Below is the recipe I have adapted and use, but you can find Giada's original recipe HERE.
Ingredients
EVOO, for greasing the baking dish
EVOO, for greasing the baking dish
2 Bundles of Swiss chard leaves
2 cups cooked short grain brown rice
1 packed cup baby arugula leaves, chopped
2 cups cooked short grain brown rice
1 packed cup baby arugula leaves, chopped
8 oz. goat cheese, at room temperature
1 cup cooked green lentils
1/4 cup extra-virgin olive oil for the filling
Kosher salt, black pepper & cayenne pepper for seasoning (to taste)
2 cloves garlic, minced
One 26-ounce jar organic marinara sauce (or homemade preferably :)
1/2 cup grated Parmesan (or a mix of Italian cheeses - my personal favorite!)
2 tablespoons olive oil for drizzling
Directions
Place an oven rack in the center of the oven. Preheat the oven to 400 degrees F. Oil a 9.5 by 13.5 inch glass baking dish. Set aside.
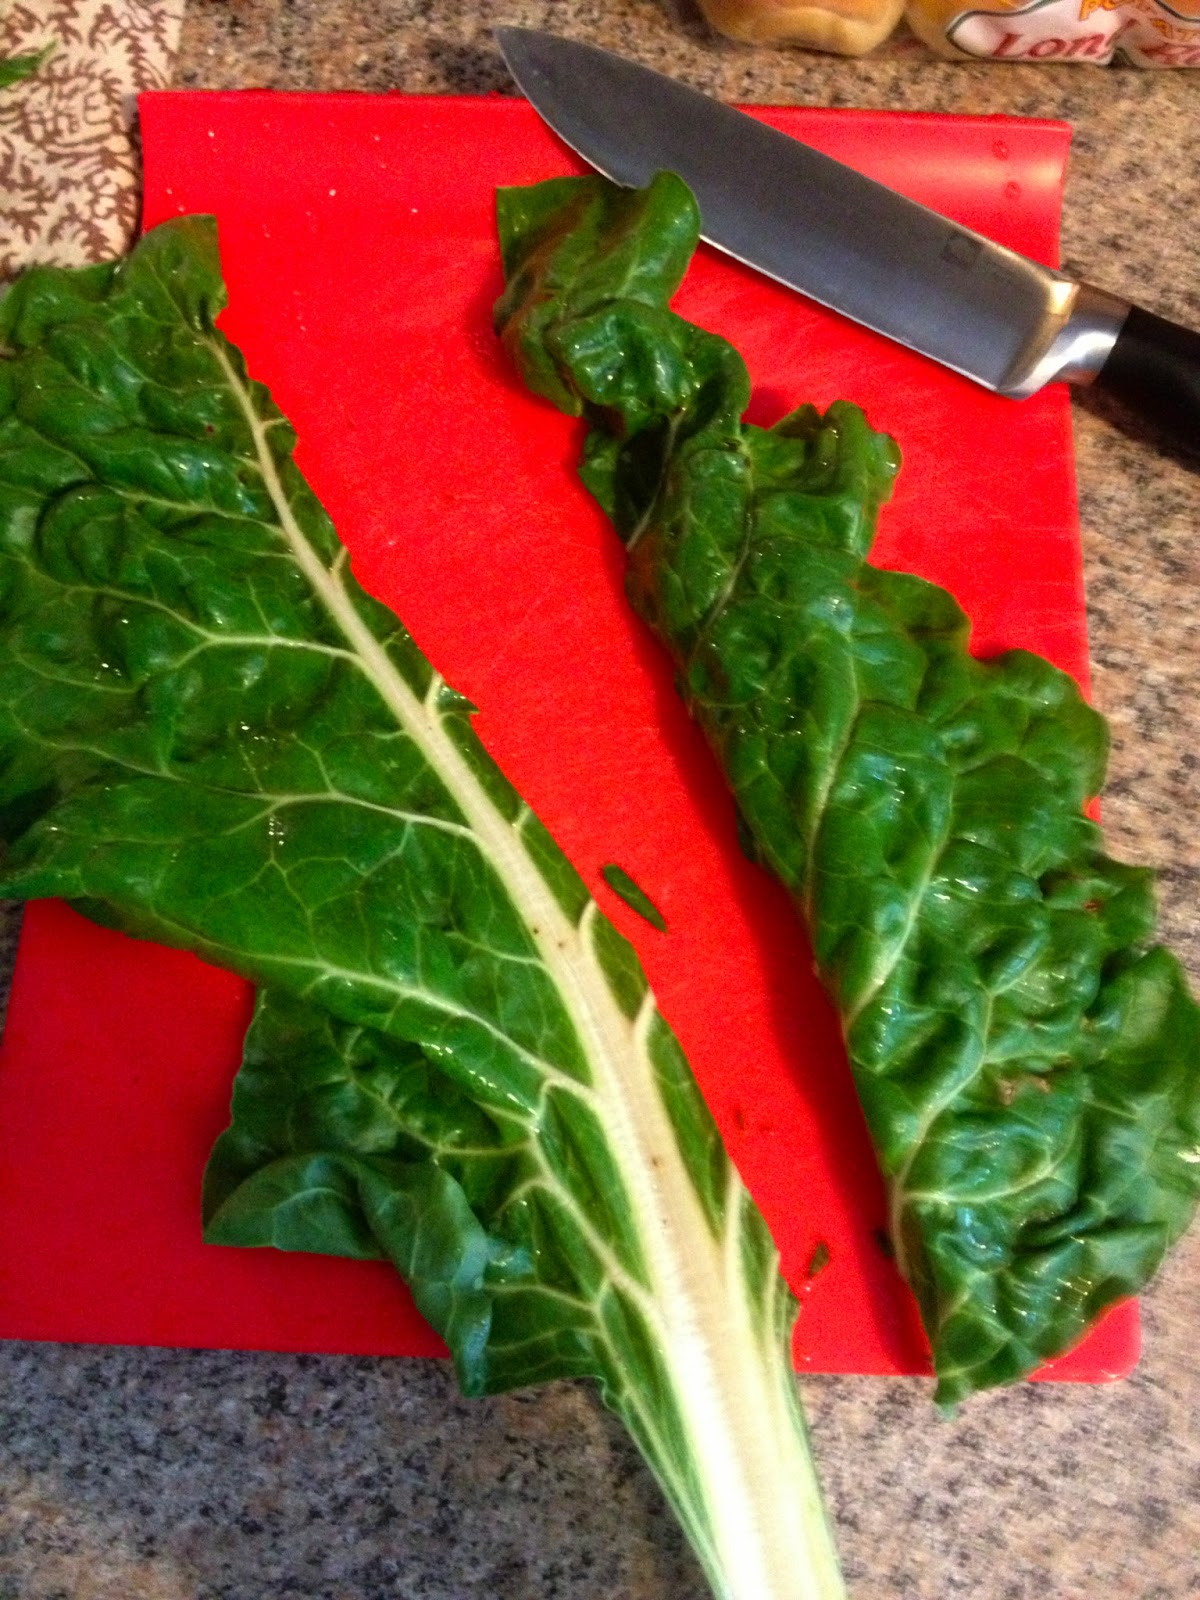
Remove the thick stem from the center of each chard leaf. Cut each leaf in half lengthwise. I cut all the leaves and use the biggest halves (approx. 16-18 halves). Store the remainder of the leaves in a ziploc bag or an airtight container and saute or use later in the week. Bring a large pot of salted water to a boil over high heat. Add the chard leaves and cook for 10 seconds. Remove the leaves with tongs and rinse with cold water. Drain on paper towels and set aside. (I did this the first time I made this recipe and didn't the second time...I couldn't tell a difference between when I did it and when I didn't).
1 cup cooked green lentils
1/4 cup extra-virgin olive oil for the filling
Kosher salt, black pepper & cayenne pepper for seasoning (to taste)
2 cloves garlic, minced
One 26-ounce jar organic marinara sauce (or homemade preferably :)
1/2 cup grated Parmesan (or a mix of Italian cheeses - my personal favorite!)
2 tablespoons olive oil for drizzling
Directions
Place an oven rack in the center of the oven. Preheat the oven to 400 degrees F. Oil a 9.5 by 13.5 inch glass baking dish. Set aside.
Remove the thick stem from the center of each chard leaf. Cut each leaf in half lengthwise. I cut all the leaves and use the biggest halves (approx. 16-18 halves). Store the remainder of the leaves in a ziploc bag or an airtight container and saute or use later in the week. Bring a large pot of salted water to a boil over high heat. Add the chard leaves and cook for 10 seconds. Remove the leaves with tongs and rinse with cold water. Drain on paper towels and set aside. (I did this the first time I made this recipe and didn't the second time...I couldn't tell a difference between when I did it and when I didn't).

For the filling: In a medium bowl, mix together the brown rice, arugula, goat cheese, lentils, olive oil, salt, black pepper & cayenne to taste and garlic.
**NOTES: When making the brown rice and lentils I cook them in vegetable broth for extra flavor and then let cool completely before mixing. Also, be sure to let the goat cheese sit out and get to room temperature to make it easier to mix. You will end up having quite a bit of leftover filling. It tastes great
cold added to a salad or used to make lettuce wraps. I have also heated
it up and added a fried egg on top for a delicious breakfast treat :)

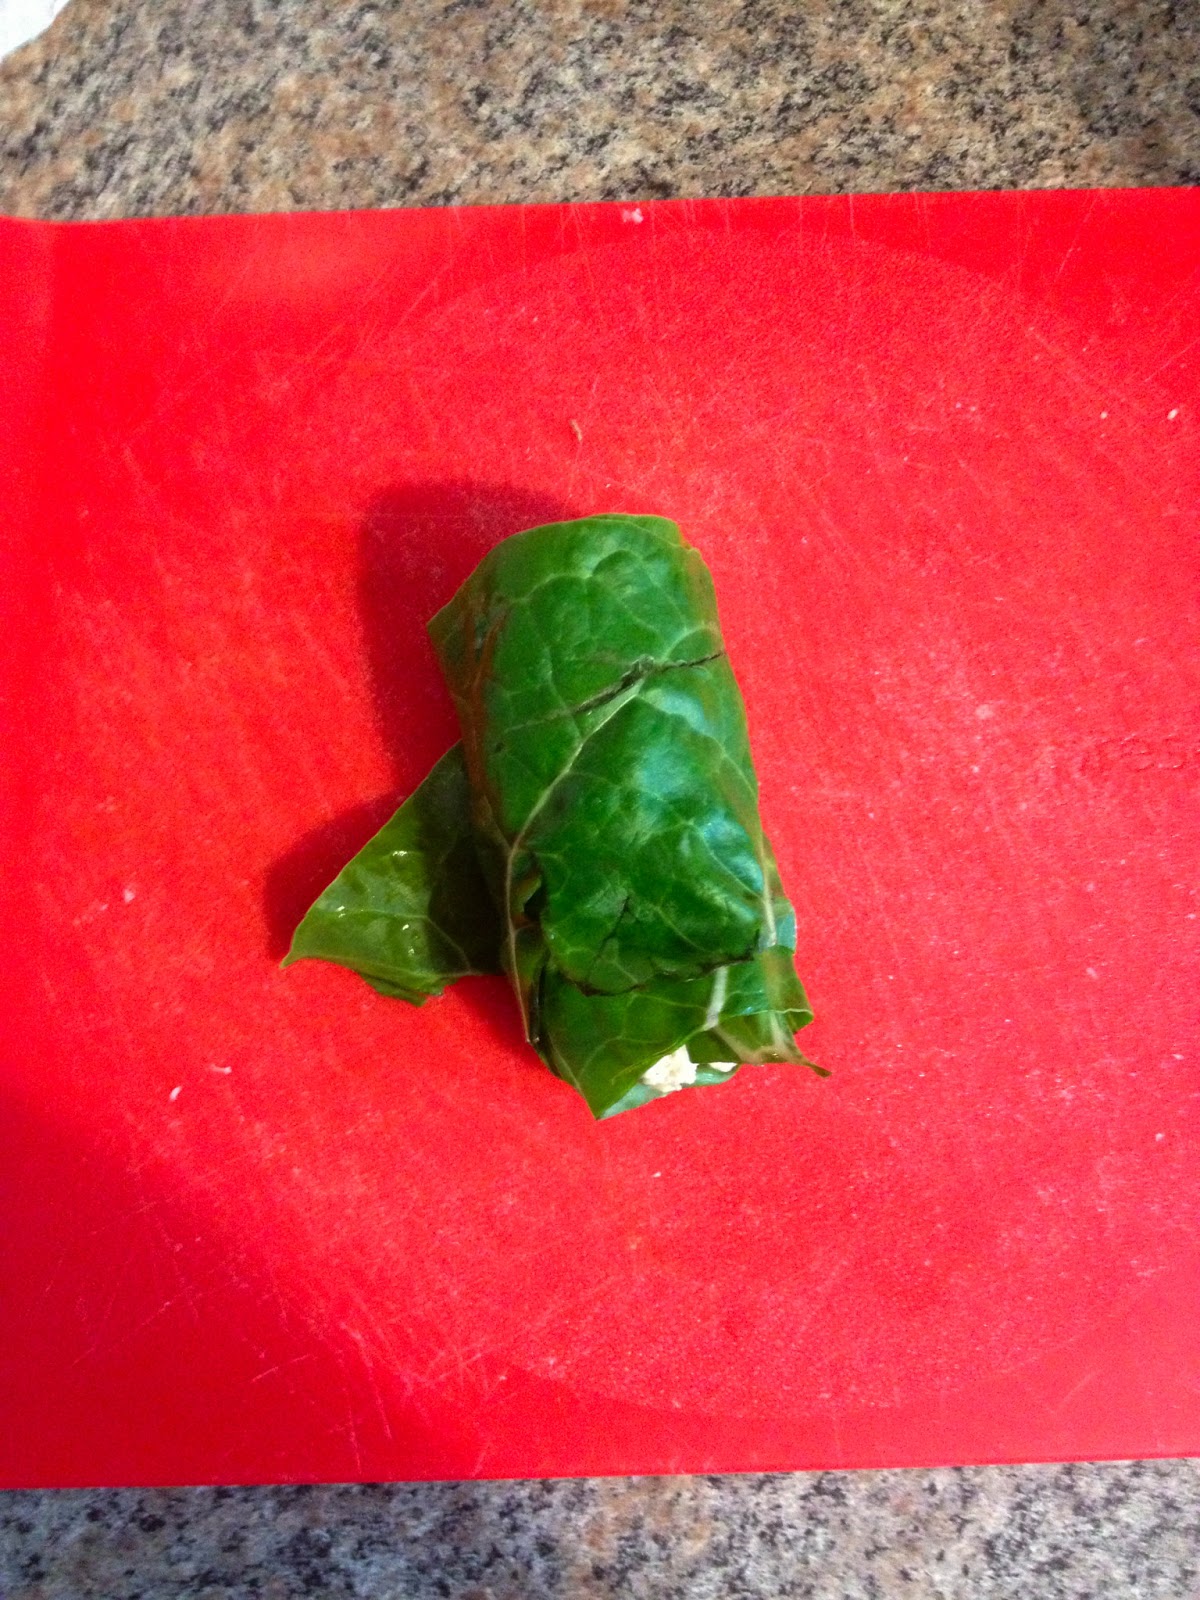
Spoon 1/3 cup of the filling onto the end of each chard leaf and roll up like a jellyroll.


Cover the bottom of the already greased pan with a little less than half of the marinara sauce. Arrange the
rolls, seam-side down, in a single layer on top of the sauce. Spoon the
remaining sauce on top and sprinkle with the grated cheese. Drizzle with
olive oil and bake until the
cheese begins to brown, about 25
minutes. Cool for 5 minutes and serve.
**I like to serve this dish with a classic bruschetta or some crusty bread and a great glass of red wine...yum! :)
**I like to serve this dish with a classic bruschetta or some crusty bread and a great glass of red wine...yum! :)


---------------------------------------------------------------------------------------
Homemade Mozzarella Sticks

Making mozzarella sticks from scratch is so easy and so delicious I will never buy them frozen again!
I made my own breadcrumbs using some unused hamburger & hotdog buns and the ends of some sprouted bread I had laying around. Just cut up the bread into smaller pieces, throw them in a food processor or blender until chopped up finely. Spread the chopped up bread crumbs on a baking sheet and put in a 250 degree oven for 15-20 minutes, let cool, store in an airtight container and your done!
**For this recipe I combined my homemade breadcrumbs with oregano, parsley, salt, pepper and garlic to make them more Italian style.
Ingredients
2 cups of Italian style breadcrumbs (homemade or store bought)
3-4 eggs, beaten
1 medium-large mozzarella ball
1/2 cup grated Parmesan cheese
1 liter olive oil or vegetable oil
Marinara sauce for dipping (homemade or organic store bought)
Directions
Line a baking sheet with parchment paper.

Mix the breadcrumbs and the Parmesan cheese (leave a little extra for
garnishing) in a mixing bowl. In a separate mixing bowl whisk the eggs
until thoroughly beaten. Cut the mozzarella into approx. twelve, 1/2 inch sticks.


Dip and coat the cheese sticks into the egg wash, allowing the excess egg to drip off and then coat in the bread crumb mixture. Place the coated mozzarella onto the baking sheet and repeat with the rest of the cheese sticks. Repeat this process coating each mozzarella stick in the egg was and breadcrumbs for a second time.


Cover the baking sheet with the double coated mozzarella sticks with another piece of parchment paper and put in the freezer for 2 hours or until frozen (you can freeze them for up to about 2 days).


Once the mozzarella sticks are frozen and you are ready to cook, heat up the olive oil in a cast iron skillet (or heavy duty frying pan). Heat to about 350 degrees (I drop in an excess piece of frozen breadcrumb that may have fell off the mozzarella sticks to test the oil). Using tongs, carefully drop the frozen mozzarella sticks in the oil in batches of 3. If using a shallow pan, turn the mozzarella sticks after about 30 seconds. It only takes about 1-1 1/2 minutes for them to cook and become golden brown. Remove from the pan using tongs and place on a paper towel lined place and repeat with the next batch until complete. Sprinkle the rest of the Parmesan cheese over the hot mozzarella sticks and serve with warmed marinara sauce.


**Remember not to waste all that frying oil! Pour into an airtight glass container, let cool and store for the next time!


